Monday, December 7, 2015

Royal Montgomery Forces

Well we hope to meet this coming Sunday evening to begin our Battle of Montgomery.  Here is an image of the Royal Cavalry wing:


And here is a view of the Royal foot:


I suggested to Murdock that the battle might be very quick since the Parliamentarians would probably simply fail their morale and flee once they face the Royalists . . . but he scoffed at the suggestion.

Well, "wait for Sunday" is what I say to him . . . then we will see if the Roundheads run.

-- Jeff

Thursday, October 8, 2015

QRS for "Warr Without an Enemie"

My gaming buddy, Murdock, created an edited version of the "Quick Reference Sheet" for the Wyre Forest Wargames Club's ECW rules, "Warr Without an Enemie".

I have simply done a bit of color management so that they can be more easily identifiable as to which page is which.


-- Jeff

Monday, September 14, 2015

Two "Battles of Whalley" Fought

Well, over the past few weeks we have now gamed the "Battle of Whalley" (April 20, 1643) at my home . . . and while I have been too "under the weather" due to my chemotherapy to actually play, David, Rob and Alex managed to fight it twice.

New!   David has posted his photos and comments from both battles:

First -- http://murdocksmarauders.blogspot.ca/2015/09/warr-without-and-enemie-battle-of.html

Second --  http://murdocksmarauders.blogspot.ca/2015/10/warr-without-enemie-battle-of-whalley.html 

Most Royalist troops start at rest in the Town.


We used the "Warr Without an Enemie" rules from the Wyre Forest Wargames Club . . . including the scenario for the Battle of Whalley (which is included in the rules as well as online).

Cavalry with 5 DPs moving over bridge.


Above you can see some Royalist cavalry moving over a bridge.  The dark rectangle on the left of the image contains its  (currently hidden) Orders.  The white square with the red "5" indicates that this unit already has five "disruption points" . . . (note that the opposite side has the numbers 1 through 4 on different sides so that it can be used to show how "disrupted" the unit currently is).

Because of the "mind fog" that my meds create, I only hosted the games and tried to somewhat follow them.  Once my chemo is over I hope to play myself.

I will leave it to the others to post their photos and accounts since they were both mentally sharper and are better photographers.  When available I will add links to their photos and accounts.

From behind Parliamentary lines mid-battle.

 -- Jeff

Wednesday, August 5, 2015

Battle of Southam (1642)

We finally got around to trying out the "Warr Without an Enemie" rules with their suggested 'learning scenario' a few days ago (i.e., August 3rd).

Early action from behind Royalist force.


Unfortunately I was unable to play (my chemotherapy leaves me very fatigued),  but I was able to host, watch and enjoy the battle as Rob (Royalist) and Murdock (Parliamentarian) battled it out.

More Royalist cavalry sweeps out as well.


In case you are curious, Murdock provided the the dark blocks in front of units have their orders written on them.  He also brought some "Disruption Point" markers (sides marked 1-4 and the reverse side with a dreaded 5).

Parliamentarian ponies move up to engage.


Sadly due to my medical state I wasn't able to follow the action well enough to recount it here . . . but hopefully Murdock will soon post an account (and much better photos) on his blog. . . . (which he has now done).

In addition, as of August 16th, Rob has posted his account and photos of the battle here.

Trying to flank the Parliamentarians.


As I mentioned earlier, I wasn't in condition to record the game BUT I do recall our all liking the rules.  For me (and I think the others) the main attraction was that the player is challenged to make lots of choices during the game.  I know that we also felt that the mechanics encouraged period results.

So the overall result of the night was that we will definitely play them again.

Oh, and the results of the battle? . . . I think that I will leave that to Murdock to write about. . . . (which he has now done).

In addition, as of August 16th, Rob has posted his account and photos of the battle here.


-- Jeff 

Tuesday, June 9, 2015

Royalist Victory at Edgehill

"The cause of the rebellious Parliamentary "roundheads" was dealt a resounding defeat during the recent battle fought near Edgehill."

Near end of battle with rebel centre destroyed


Murdock and Rob were supposed to stop by on Sunday night to play out our 28mm Battle of Edgehill using the "For God, King and Country" rules . . . but Murdock had transportation difficulties so he emailed me to have Rob (who hadn't even read the rules) take over command of the "Roundheads".

Unfortunately Essex (Murdock) had previously committed his reserves to shoring up his left flank so he had left nothing behind his front line . . and at the end of our last session, Apsley's regiment had destroyed its opponent opening up the rebel front.

Needless to say, while Essex (Rob) did his best, King Charles (long may he reign) exploited this opening and soon the end became inevitable and so before long the forces of Parliament were fleeing the field.

"While the leaders of the disloyal opposition have fled, the public need not fear.  They will be apprehended and punished for their crimes by the justice of our good king."

Following are some more images of the action:

Royalist left flank at mid-battle

Parliamentary view of centre opening up


The Roundhead flank is open . . . a target rich feast

Having defeated the Rebel right and centre, Charles closes in for kill


<<< ====== >>>

Rob was expecting to play on my side as a Royalist and had brought some of his finely painted troops.  Here are a few images of them:

Mounted unit by Rob P.

Part of Tillier's regiment by Rob P.

Prince Rupert had foot as well as horse . . . by Rob P.


-- Jeff

Thursday, June 4, 2015

More Edgehill

Last Saturday Murdock and I picked up our interrupted Battle of Edgehill.  We were joined by Rob P. who was interested but had never fought with any historical figures (his playing background was with Games Workshop rules).  So of course I gave him a command.

A view toward the Royalist left where Rob is about to charge


One of Rob's cavalry units was about to make his first charge with historical miniatures, which it then did:

Rob P's photo of his troops charging home.

Slamming home . . . and in the resulting melee his Royalist troops emerged victorious.

As we fought on several units (on both sides) were eliminated during the short time we had to play . . . but never fear, we will soon continue this epic encounter.

-- Jeff

Monday, May 18, 2015

Battle of Edgehill -- a First Look

The first major battle of the English Civil Wars was Edgehill . . . so that is what Murdock and I chose as our first battle.


View from behind the Royalist center with Rebels in distance.


Murdock has already posted a pair of blog posts on our battle . . . with much better photos than the few I took:

http://murdocksmarauders.blogspot.ca/2015/05/edgehill-for-god-king-and-country.html

http://murdocksmarauders.blogspot.ca/2015/05/edgehill-for-god-king-and-country_17.html

Also to correct something I had posted earlier . . . we ended up playing on a 5' wide by 10 1/2 foot long table since the 8' table was not long enough.

Also I should publicly thank Murdock's son Alex for his help in playing my right wing (i.e., Prince Rupert's command) since I am somewhat challenged healthwise and was not physically up to dealing with the long table.


Pre-battle view of Royalist right . . . Alex's command

I won't try to recreate the battle (I wasn't up to taking notes) . . . but following are a pair of photos that I took later.

looking from Royalist left down the line.


Casualties mount up on Royalist right wing.

 We had to suspend that battle after seven full turns because Murdock and Alex had a prior commitment (and I was running out of energy) . . . but we are planning on resuming it on this coming Wednesday evening.

-- Jeff

Wednesday, May 13, 2015

Edgehill -- Telling which Side is which

Historically units for both sides looked very much the same . . . so how will you tell Murdock's Roundheads apart from my Royalists?

Easy . . . look at the basing.  Murdock uses thin bases while I use thick ones.  Furthermore he uses thinner dark-coloured pikes while I use thicker light-coloured ones (see below):

Parliamentarians -- thin bases & dark thin pikes

Royalists -- thick bases & light-coloured thicker pikes


A similar basing system is used for the cavalry so hopefully this will help keep the sides clear as you try to follow our upcoming Edgehill battle.

-- Jeff

Thursday, May 7, 2015

Edgehill -- Horse & Foot

Hopefully Murdock and I will get to play the "Battle of Edgehill" later this month as we start our ECW gaming.  I still have the command stands to paint but all of my rank-and-file troops are ready.  (note because my game table is in use as a painting table, I've had to take photos on a couch so the colors are weird).

The Gentlemen Pensioners


While we built all of our basic units with six 2" square stands each for smaller battles, we will be using the "For God, King and Country" rules for Edgehill (and other large battles)

Translating their 15mm basing for our 28mm collections, we have two stand Cavalry units and three-stand Foot units (one pike & two shot).

Due to the nature of our collections AND the dearth of knowledge about many units, we have had to substitute units we have in quite a few instances.  I have tried to be as correct as I could but there are instances where nothing is known.

Following are photos of my Royalist pike & shot units for Edgehill.  The rules that we are using include a scenario built on the "five brigade" model (as opposed to the nine brigade model).  As always, click on photos for a larger image (and open in separate window by double-clicking for largest image):


As for the Cavalry, other than the Gentlemen Pensioners (pictured at top of page) who were in reserve and didn't do anything, they were formed up on the left and right:

Left Wing Cavalry

Right Wing Cavalry


I have a bunch of figures I will temporarily use for dismounted Dragoons if I don't have time to get the real ones painted but I've not taken photos of them; nor of my Artillery . . . and of course, my Generals and Brigadiers are still on painting sticks.

By the way, so far the leading contender for our smaller action ECW games is "Warr Without an Enemie" . . . but we are still open to other suggestions.

-- Jeff

Thursday, January 29, 2015

Progress on my ECW Horses

I now have close to 150 horses almost finished . . . that is the good news.  The bad news is that I am not nearly so far along with their riders.


All that I have left to do with these horses is to paint their saddle cloths . . . but they look like a lot of horses, don't they?

What?  Do I hear mummers of unease?  Surely I need to add more horsey detailing? . . .  Actually, no. . . . Please allow me to espouse a bit of my tabletop philosophy.

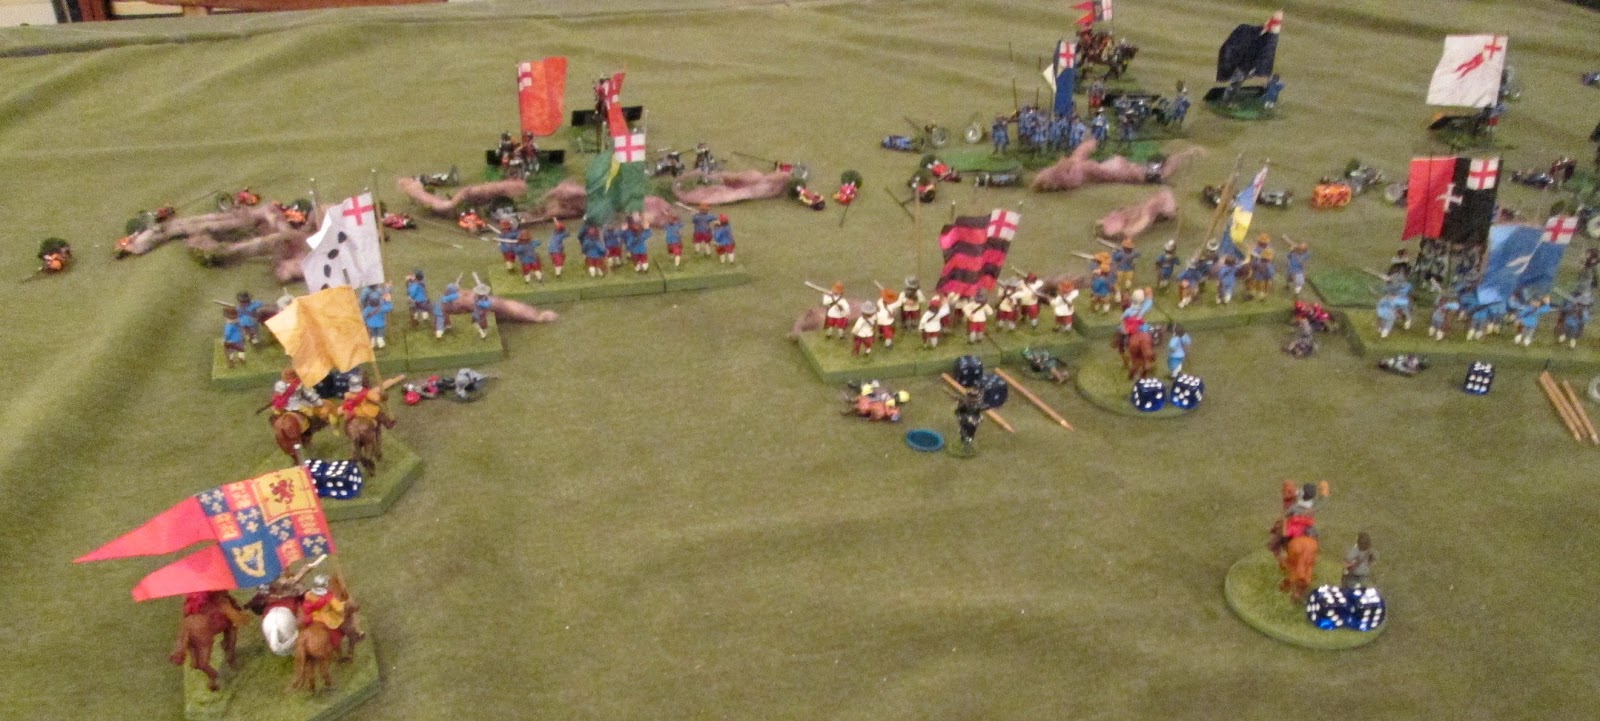
With cavalry I want the focus to be on the rider, not the horse.  I paint my horses very quickly and simply (as described below).  Particularly since they will be in units, I want the viewers' eyes to "see" horse (you did, didn't you, when you saw the photo above?) and to focus on the rider.

I know that others paint beautiful horses . . . and I appreciate that . . . but my figures are for tabletop play and I'm satisfied with my philosophy.

Some years ago I was timed on my horse painting technique and it was determined that I spent less than a minute and a half total brush time per horse.

"Impossible", you say?  Not at all.  There is of course considerable "drying time" between steps associated with my method, but the "brush time" is quite short.

I start by "black priming" with a spray primer (this is not "brush time" but it doesn't take long).  I wait at least a day, usually more before moving on.  Then I do a very quick "damp brush" with white over the horses . . . so that the raised areas and broad flat areas are covered.  The result looks something like this:


Each horse (even those with the same pose) will have a slightly different mix of black and white.  After that dries, I will then do another (slightly drier) "damp brush" with a "horse color" (numerous tans, light browns, red-browns, and darker browns).

It is important to keep in mind the fact that most paints (especially yellows, reds, and many browns) are really translucent and not opaque.  I don't have a photos of this step, but the result should have a mix of black, white and horse color . . . but it is certainly on the blotchy side.

After they are dry, the final step is to "ink them".  I mostly used two different inks for the horses at the top of this post . . . a chestnut ink and a tree brown ink. . . . I mixed them each about 50/50 with water and "washed" the horses with one or the other. 

(Note -- a few horses were washed with a third "nut brown" ink that didn't do well so I will have to re-ink those before using them on the table top.  Perhaps you can spot them.)

I should also note that I turn the painting stick upside down so to be sure to get their bellies and undercuts from below, then run some wash over the top as well.  And again, this (like previous steps) is a very quick process.  I am not being "overly careful".

You can see the result . . . and they look like horses to me . . . although they will look much better with riders (which are not nearly as easy to paint):


-- Jeff